Do you have a small backyard? Raised garden beds are useful for keeping your garden tidy. Building a raised bed is something you can do yourself. Raised beds typically have better drainage than ground-level gardens. It helps prevent water logging and root rot. This accessibility is beneficial for people with mobility issues. How to build a raised garden bed? I have created a complete guide to help you build a raised bed.
What is a Raised Garden Bed?
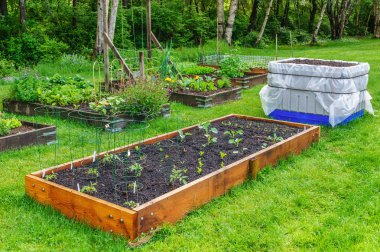
A raised garden bed is essentially a large container, typically made of wood, metal, or plastic. Typically, resided beds are filled with soil and used for gardening. It’s called “raised” because it’s higher than the ground level. So it forms a sort of raised platform for planting.
That’s why I tried to make one for my garden. And I found that it is not too complex to make. That’s why I have made a guide to help those of you who are also trying to make a raised garden at home.
Benefits of Creating Raised Bed
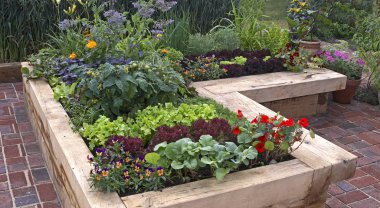
- Better Soil Control: Since you fill the raised bed with soil yourself, you have more control over its quality. You can choose the type of soil that suits the plants you want to grow, ensuring optimal growing conditions.
- Improved Drainage: Raised beds usually have good drainage because they are elevated. This prevents waterlogging, which can be harmful to plant roots.
- Reduced Weed Growth: Raised beds can help reduce weed growth because they are contained and can be filled with weed-free soil. Additionally, it’s easier to spot and remove weeds in a raised bed compared to a traditional garden.
- Warmer Soil: The soil in a raised bed warms up faster in the spring, allowing you to start planting earlier in the season. This can extend the growing season and increase overall plant productivity.
- Easier Access: Raised beds can be built to a height that is comfortable for gardening, reducing the need for bending or kneeling. This accessibility is especially helpful for people with mobility issues or those who have difficulty gardening at ground level.
How to Choose the Perfect Material For a Raised Garden Bed?
When it comes to choosing the right material for raised beds, there are several factors to consider. The material you choose will play a crucial role in the longevity, appearance, and overall success of your raised bed garden.
Here are some common options you may consider before trying to build a raised garden.
Wood is Better
The best part of the wood is, it is available. Pine is the cheapest one to try out. But it may rot after a few years. So if it’s your home, and you are building a raised bed, then you should avoid it. Cedar can be great because it lasts for 10–15 years according to my friend.
You can Also Use Modern Treated Wood
You can also try modern treated wood. But the problem is that some gardeners feel uncomfortable while using treated wood. Inside the raised bed, you can use polythene. It may feel more expensive than some other options, but may still eventually break down.
Try Composite or Plastic Lumber
It is extremely durable and long-lasting, as well as low maintenance, and resistant to rot and insect attack. You can consider it as a good option.
Concrete Blocks or Bricks
Very durable and long-lasting, low maintenance. But the problem is that I found it increases the soil pH over time. If you have little gardening experience, you will be able to understand the issues.
Besides, these types of garden beds are heavy and difficult to move or modify. If you are going to increase the aesthetics of your garden then this is not the option for you.
Metal (Galvanized Steel or Aluminum)
Highly durable and long-lasting, resistant to rot and insect damage. There are similar issues: they can be expensive, may not have a natural appearance, and can leach chemicals into the soil (ensure the metal is food-safe).
Stone or Rocks
The bed can be built around the soil mound you have already constructed. Extremely durable and long-lasting, natural look. But I don’t think it’s a good option.
Note: Let me make things easier for you. When choosing the right material, consider factors such as your budget, desired aesthetics, maintenance requirements, and the longevity you expect from your raised beds. So that you can choose the right material for your garden bed.
How Wide and Deep Should Your Raised Bed Be?
Wide of the raised bed
You have to keep your garden accessible. So I think you should aim for a width of 4 feet or less for your garden beds. This allows easy access without stepping into the bed. Plus, it’s convenient because lumber often comes in 4-foot lengths. The soil can become compacted when you step onto the bed. It reduces oxygen levels and harms plant roots.
Depth of the raised bed
Standard lumber, like cedar, often comes in sizes like 2 inches by 6 inches by 8 feet. But remember, when you buy them, they’re actually 1.5 inches thick and 5.5 inches high. If you stack two of these boards, you get a height of 12 inches. You can make your raised garden bed taller if you want, like 18 inches, 24 inches, or even 36 inches
The types of crops you plan to grow can also play a role in determining the ideal width. For example, if you intend to grow root vegetables or plants that require more frequent maintenance, a narrower bed (2-3 feet) may be more convenient. Conversely, if you plan to grow larger plants or those that require less frequent tending, a wider bed (up to 4 feet) could be suitable.
Besides, consider your own physical capabilities when determining the width of your raised bed. If you have limited mobility or prefer to avoid excessive reaching or bending, a narrower bed (2-3 feet) may be more comfortable and practical.
How to Build Your Raised Garden Bed: A Step-by-Step Guide
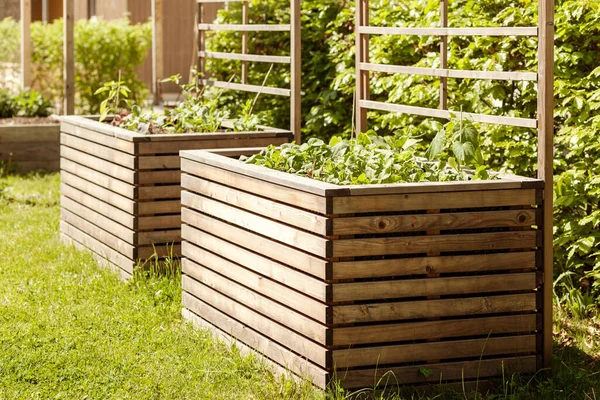
Now let’s come to the main part of the guide. With my minimal DIY skills, I created a simple sandbox-like box. Adding a raised garden bed to your garden can enhance your gardening experience in a simple and rewarding way. Follow these step-by-step instructions to create a sturdy and functional raised bed for your garden.
Materials Needed To Create Raised Garden Bed
- 3 pieces of 8-foot long 2″x6″ lumber (or 2″x8″ or 2″x10″ if available) for a 4×8 footbed
- 2 pieces of 8-foot long 2″x6″ lumber for a 4×4 footbed
- Exterior-grade screws (deck screws)
- 2×4 or 4×4 pieces of lumber for corner reinforcement (optional)
- Drill/driver and bits
- Saw (if cutting the lumber yourself)
- Tape measure
- Screwdriver
Prepare the Lumber
For a 4×8 footbed, have one of the 8-foot pieces cut in half at the lumberyard to create two 4-foot lengths for the ends. I used cedar wood to make the raised bed. For a 4×4 footbed, have both 8-foot pieces cut in half to create four 4-foot lengths.
Lay Out the Frame
Position the lumber pieces on a flat surface in the desired shape (rectangle or square) for your raised bed. Make sure the corners are square, and the pieces are flush.
Reinforce the Corners (Optional)
Cut 2×4 or 4×4 pieces to fit snugly into the corners of the frame. Secure these corner pieces in place using exterior screws. Make sure each wall is secured by screwing them together with long screws.
Assemble the Frame
- Begin at one corner and fasten the ends of the boards together using exterior screws. Drill pilot holes beforehand to avoid splitting the wood.
- Proceed to secure the boards at each corner, ensuring a snug and secure connection throughout the frame.
Add Additional Support (Optional)
If your raised bed is longer than 4 feet, consider adding additional supports along the length of the frame by securing a 2×4 or 2×6 piece across the middle.
Level the Bed
Once assembled, place the raised bed frame in its desired location. You can use a level to ensure the frame is level and adjust as necessary by adding or removing soil beneath the frame.
Line the Bed (Optional)
If desired, line the bottom of the raised bed with landscape fabric, cardboard, or a layer of newspaper to prevent weeds from growing through.
Remember, the dimensions provided in this guide worked for me. You can adjust the size of your raised bed according to your available space and gardening needs. With some basic tools and materials, you can easily create a customized raised garden bed that will provide you with a productive and enjoyable gardening experience for years to come.
Raised Bed Filling With Soil
Filling a raised bed properly is crucial for ensuring optimal growth and productivity in your garden. It is the most important part of the raised bed garden. Here’s a comprehensive guide on how to fill a raised bed effectively:
Determine the Soil Volume Needed
- Measure the length, width, and depth of your raised bed.
- Calculate the volume by multiplying the length by the width by the depth (in cubic feet or cubic meters).
- This will give you an estimate of how much soil you need to fill the bed.
Prepare the Base
If your raised bed is placed directly on the ground, cover the bottom with a layer of landscaping fabric or cardboard to suppress weed growth.
For better drainage, consider adding a 2-3 inch layer of gravel or crushed rock at the bottom before adding soil.
Choose the Right Soil Mix
Raised beds require a well-draining, nutrient-rich soil mix. Consider using a blend of topsoil, compost, aged manure, and additional organic matter like peat moss or coconut coir. A typical soil mix ratio could be 1 part topsoil, 1 part compost, and 1 part additional organic matter.
Add Soil in Layers
- Fill the raised bed with the soil mix in layers, tamping down each layer gently to remove air pockets.
- Alternate layers of different materials (topsoil, compost, etc.) to ensure even distribution throughout the bed.
Consider Adding Amendments
Depending on your soil mix and the plants you plan to grow, you may need to add amendments such as:
- Fertilizers (organic or slow-release)
- Lime (to raise pH for acid-loving plants)
- Rock minerals like greensand or rock phosphate
- Follow the recommended application rates on the product labels.
Leave Room for Settling
Fill the raised bed leaving a few inches (5-10 cm) from the top to account for settling and future top-dressing.
Top with Mulch (Optional)
Consider adding a 2-3 inch layer of organic mulch (like wood chips or straw) on top of the soil to help retain moisture and suppress weeds.
Water the Bed
After filling, water the raised bed thoroughly to settle the soil mix and remove any remaining air pockets. Let the raised bed sit for a few weeks before planting to allow the soil mix to settle and stabilize. Top up with additional soil mix if needed after settling occurs.
Here what I used:
- 4 cubic feet of topsoil
- 3 cubic feet of coconut coir (eco-friendly alternative to peat moss)
- 2 to 3 cubic feet of compost or composted manure
- 2-inch layer of shredded leaves or grass clippings (ensure they’re herbicide-free)
I mixed all materials well and water thoroughly. Mulched with organic matter like leaves or straw. In the first year, little fertilizer is needed, but in subsequent years, you have to consider adding a balanced, slow-release fertilizer or more compost. Top off the bed with mulch to retain moisture and suppress weeds.
The quality of the soil mix you use will significantly impact the health and productivity of your raised bed garden. Take the time to prepare the bed properly, and your plants will thrive and reward you with an abundant harvest.
Raised beds offer a versatile and controlled environment for growing a wide variety of plants. Here are some excellent choices to consider planting in your raised beds:
Vegetables
- Tomatoes
- Peppers
- Leafy greens (lettuce, spinach, kale)
- Root vegetables (carrots, beets, radishes)
- Peas
- Beans
- Cucumbers
- Zucchini
- Eggplants
- Herbs (basil, cilantro, parsley)
Fruits
- Strawberries
- Blueberries
- Raspberries
- Dwarf fruit trees (apple, pear, peach)
Flowers
- Marigolds
- Zinnias
- Sunflowers
- Cosmos
- Nasturtiums
Bulbs
- Tulips
- Daffodils
- Alliums
- Lilies
Perennial Herbs
- Rosemary
- Thyme
- Sage
- Lavender
- Chives
When choosing what to plant in your raised beds, consider the following factors:
- Sunlight Requirements: Choose plants that match the sun exposure in the location of your raised beds (full sun, partial shade, or shade).
- Crop Rotation: Practice crop rotation to prevent soil depletion and pest/disease buildup. Rotate crops from different families each season.
- Companion Planting: Plant vegetables, herbs, and flowers that can benefit each other through pest deterrence, nutrient exchange, or other symbiotic relationships.
- Vertical Growing: Utilize vertical space by growing vining plants like cucumbers, pole beans, or peas on trellises or cages.
- Succession Planting: Stagger plantings of crops like lettuce or radishes to extend the harvest season.
- Intensive Planting: Raised beds allow for intensive planting, so you can maximize your yield by planting crops closer together.
Raised beds provide excellent drainage, warmth, and nutrient-rich soil, making them ideal for growing a wide range of plants. With proper planning and care, you can enjoy a bountiful and diverse harvest from your raised bed garden.
Get started Growing
Hope you got a complete idea about how to make raised garden beds easily. All you need to spend is the money on buying materials, the rest you can do by yourself. Just make a proper plan, follow the procedure and the rest is easy to pull off. You’re ready to plant and grow your garden once you’ve built your raised bed and filled it with soil and compost.
FAQs
What do I put on the bottom of a raised garden bed?
Before filling your raised garden bed with soil, it’s recommended to add a layer of material on the bottom for better drainage and to prevent weed growth. Here are some common options:
- Landscape fabric or cardboard to suppress weeds
- 2-3 inches of gravel or crushed rock for improved drainage
- Hardware cloth or wire mesh to deter burrowing pests like gophers or moles
Is plywood good for raised beds?
Plywood can be used for raised garden beds, but it’s not the ideal material. Here are some considerations regarding the use of plywood:
Pros:
- Inexpensive and readily available
- Easy to cut and assemble
- Can be coated with a sealant for added protection
Cons:
- Not as durable as solid wood, susceptible to moisture damage
- May only last 2-5 years before needing replacement
- Some types of plywood contain adhesives/chemicals that could leach into soil
- Plywood edges can become rough and splintered over time
How long do raised beds last?
The longevity of raised garden beds depends largely on the material used:
- Cedar or redwood: 10-15 years
- Untreated pine or fir: 3-7 years
- Plywood: 2-5 years
- Composite or plastic lumber: 10+ years
- Stone, brick or concrete: 20+ years
- Metal: 10-20+ years
